<--- Clover PracticePay Help /Clover Devices
Use accessories: PIN Entry Aid
Use the Flex PIN Entry Aid
Our PIN Entry Aid is used to assist with visual disabilities to enter their PIN on the Clover Flex and Mini devices. Store the PIN Entry Aid close to your devices for quick access.
Attach Flex PIN Entry Aid
1. Place the PIN Entry Aid securely on top of the Flex 4 or Flex Pocket when you reach the Enter PIN screen.
2. Wrap the corners of the PIN Entry Aid around the corners of the Flex.
Use the Flex PIN Entry Aid
1. Secure the PIN Entry Aid onto the Flex when you reach the Enter PIN screen during a transaction.
2. (Optional) If the customer prefers to run their transaction as credit instead of debit, press the Skip button and remove the PIN Entry Aid.
3. Give the Flex to the customer to enter their PIN.
4. The customer will hear a tone indicating their PIN was successfully submitted and they can remove their card.
5. Remove the PIN Entry Aid once the customer’s PIN has been entered and complete the transaction.

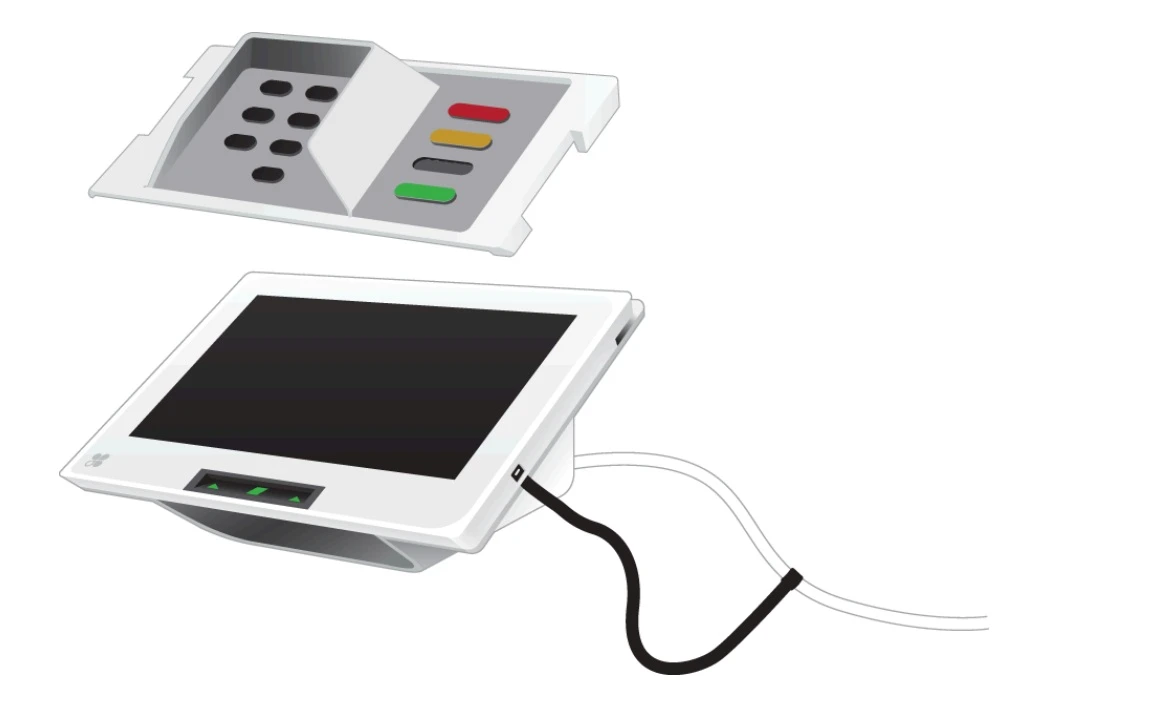
Use the Mini PIN Entry Aid
Our PIN Entry AID is used to assist customers with visual disabilities enter their PIN on the Clover Mini 3.
Attach Mini PIN Entry Aid
1. Place the PIN Entry Aid on your device when you reach the Enter PIN screen during your transaction.
2. Align the top of the shield with the top of the Mini 3’s screen so the Cancel, Clear, and Enter align with the buttons on the screen.
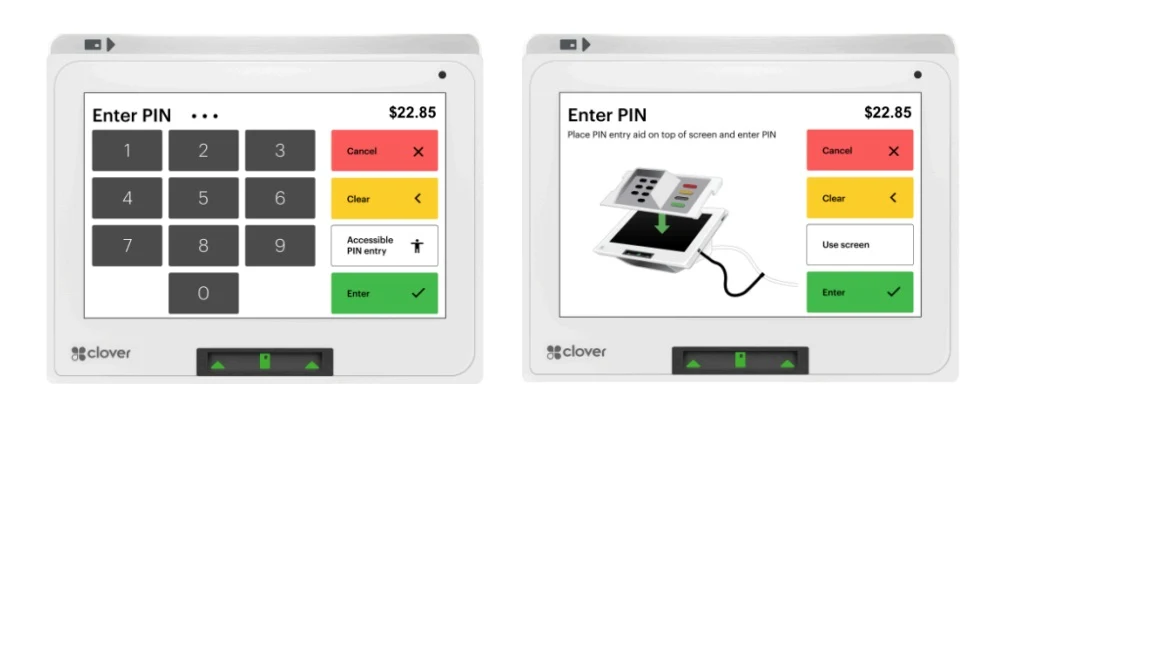
Use PIN Entry Aid
1. Once the PIN Entry Aid is securely placed on the Mini 3, rotate the screen toward the customer and allow them to enter their PIN.
2. (Optional) If the customer prefers to run their transaction as credit instead of debit, press the Skip PIN button and remove the PIN Entry Aid.
3. The customer will hear a tone indicating their PIN was successfully submitted, and they can remove their card.
4. Rotate the Mini 3 back toward you and remove the PIN Entry Aid.
5. Continue through the transaction as prompted on the screens on the Mini 3.
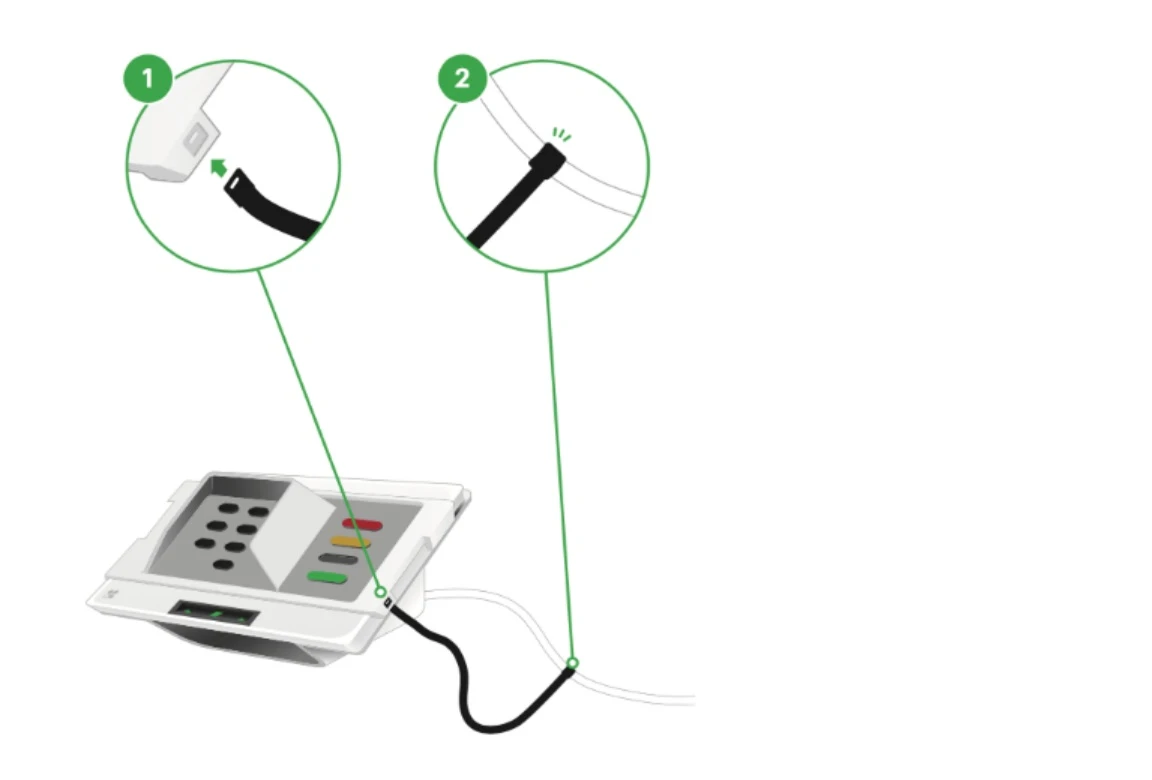
Store the PIN Entry Aid
Store the PIN Entry Aid close to your Mini 3. We encourage you to keep the PIN Entry Aid attached to your Mini’s charging cable for consistent storage and quick access.
Use the attachment lanyard provided and connect as shown in the following image: