<--- Clover PracticePay Help /Clover Devices
Set up a Flex 4
With Clover Flex, you can accept payments however your customers prefer. Customers can insert, swipe, or tap a card, or use Apple Pay®, Google Pay™, and Samsung Pay® by tapping an NFC-enabled phone or watch on the contactless payment reader. Here’s a guide to what’s in the box, what features are on the Flex, and how to get ready to use it.
What's in the box
Your Flex 4 ships with items documented in the Flex 4 Quick Start Guide (PDF).
Flex with silicone sleeve
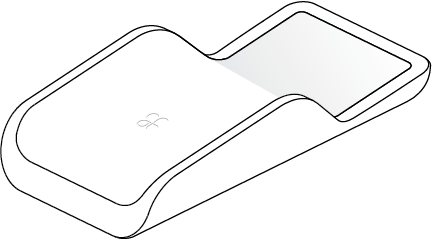
Charging cradle

Receipt paper roll

Power adaptor
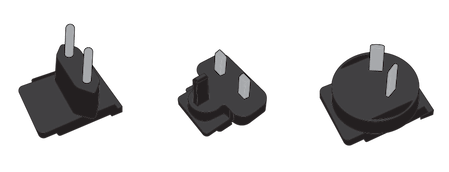
Applicable plug(s) for select regions

Screwdriver (included in select regions)
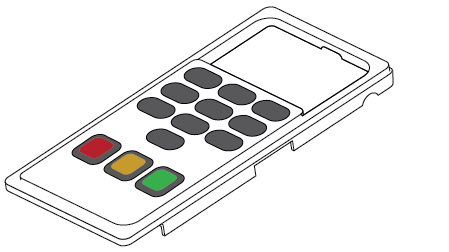
PIN entry aid (included in select regions)
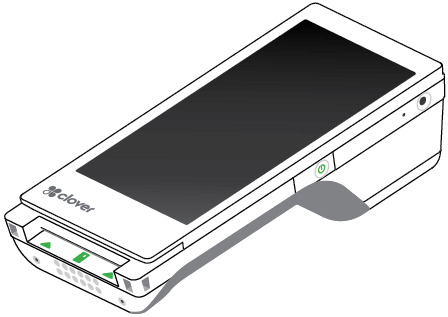
What's on the Flex
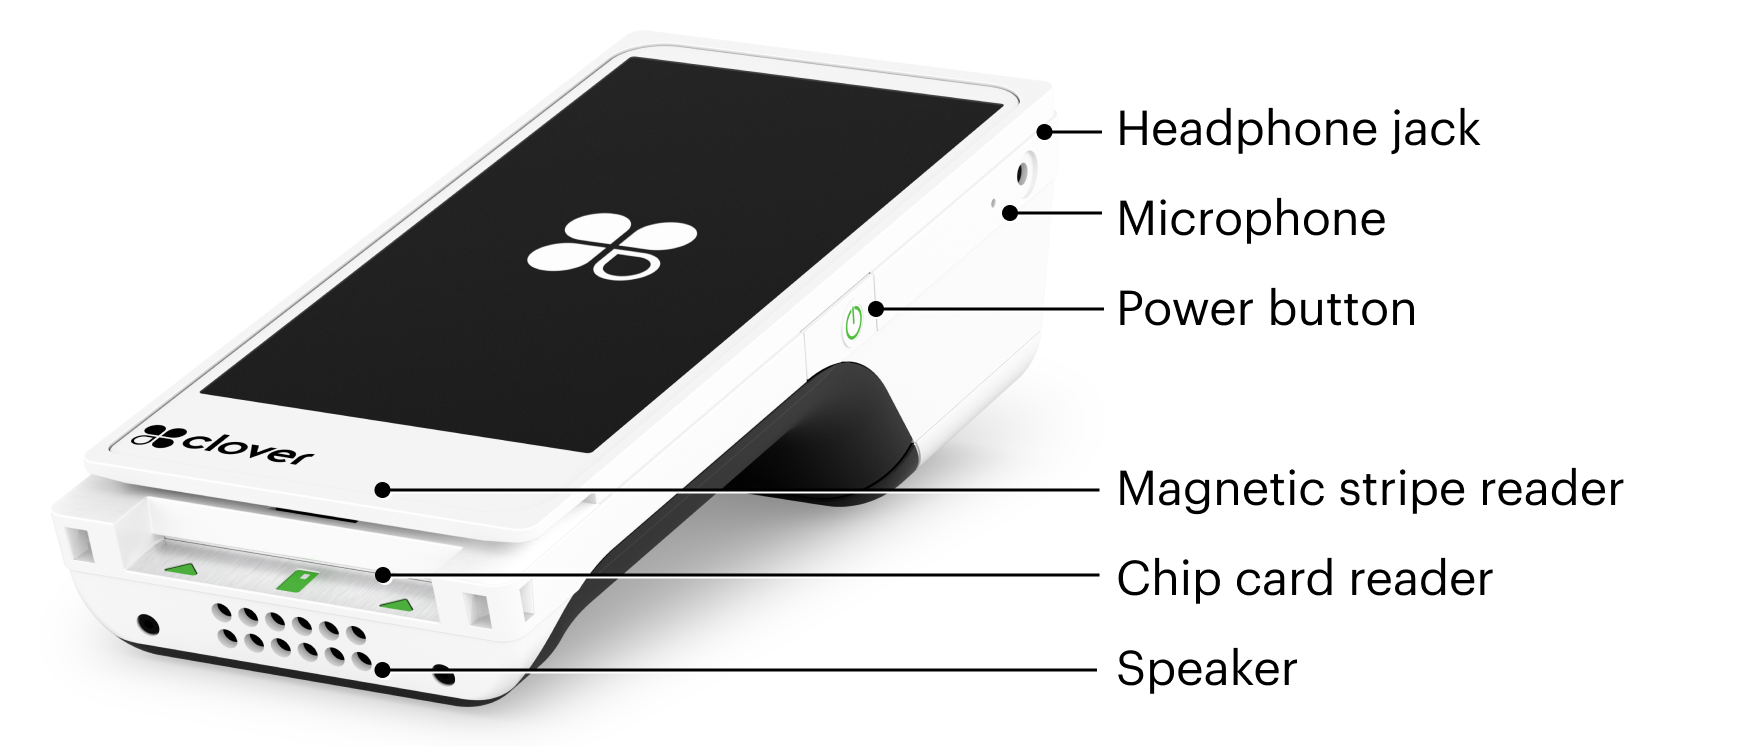
Power button: Turns the Flex device on and off.
Chip card reader: Accepts inserted chip‑enabled cards for EMV transactions.
Magnetic stripe reader: Reads cards when customers swipe their magnetic stripes.
Contactless payment reader: Allows customers to tap chip cards or NFC‑enabled phones and watches to pay.
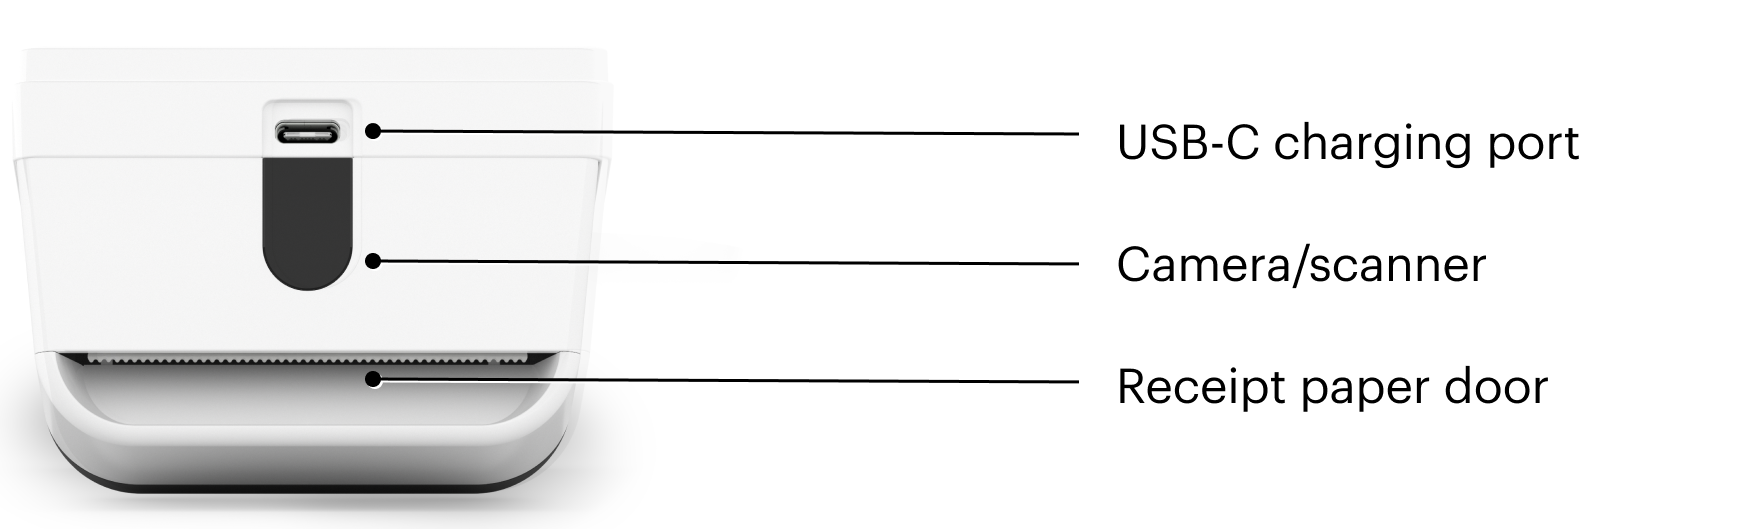
Camera/scanner: Scans barcodes and QR codes and captures photos of checks when the trigger is held during scanning.
Receipt paper door: Opens by pulling down so you can load receipt paper.
USB‑C charging port: Charges the device using the Clover travel kit power charger or any USB‑C charging cable.
After you set up your Flex Pocket, you need to activate and secure your device.
The Flex comes with a SIM card in some regions, which you can access by removing the battery. Learn how to change the SIM card.
Manage your Flex 4
Identify your Flex
Clover supports different Flex models, which are identified by their serial numbers. To find your serial number:
Open the receipt paper door.
Remove the paper.
Find the serial number (S/N) in the compartment. The serial number starts with the letter C and is followed by numbers that indicate the version and uniquely identify this device.
If you need to contact Clover Support, be sure to have the serial number handy when you call.
Charge your Flex
The Flex arrives with enough battery power to set it up and activate it. You can fully charge it whenever you have the time.
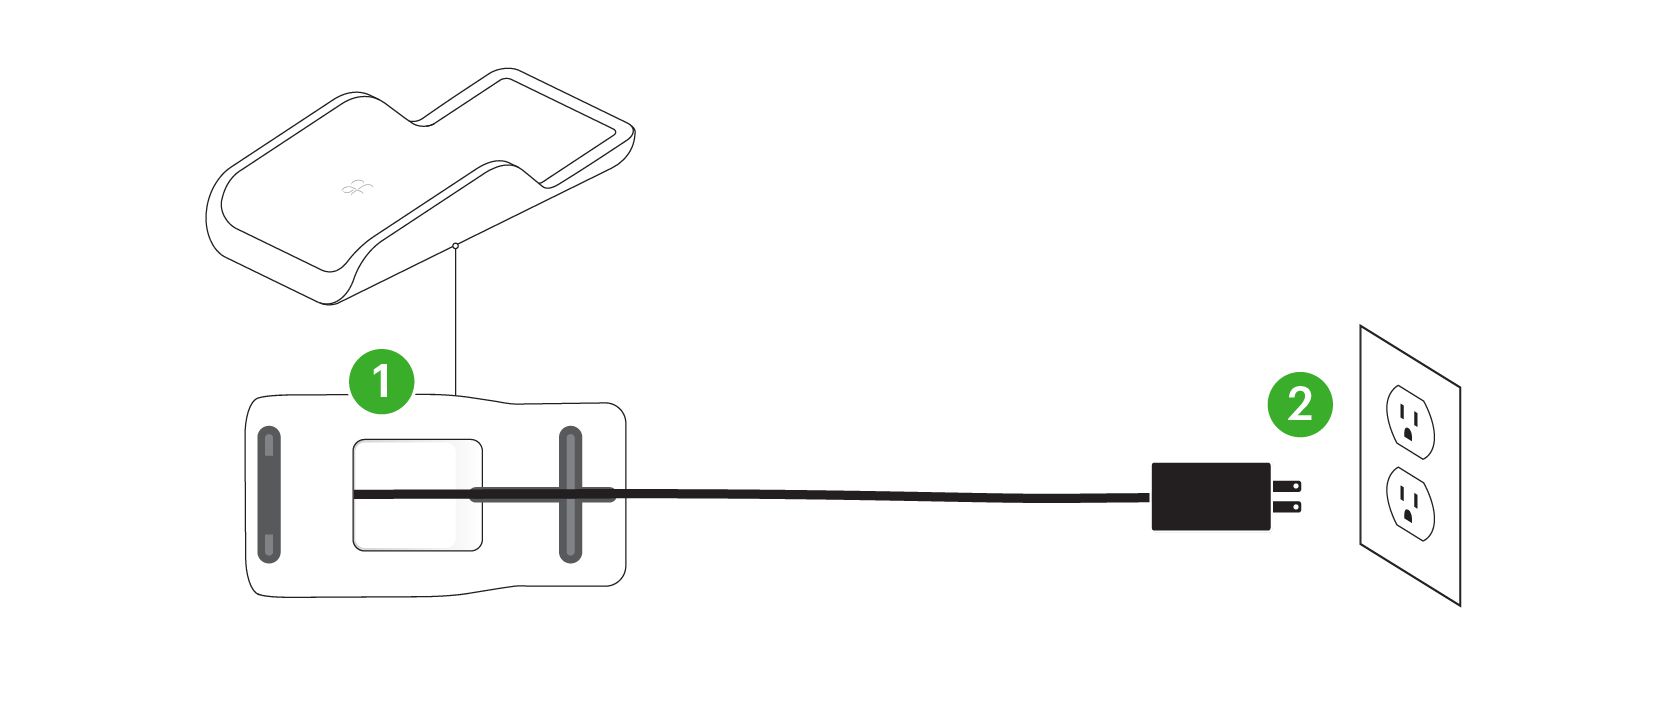
Hold the charging cradle upside down
Firmly insert the cord attached to the power brick into the charging port, and then thread the cord across and out the back.
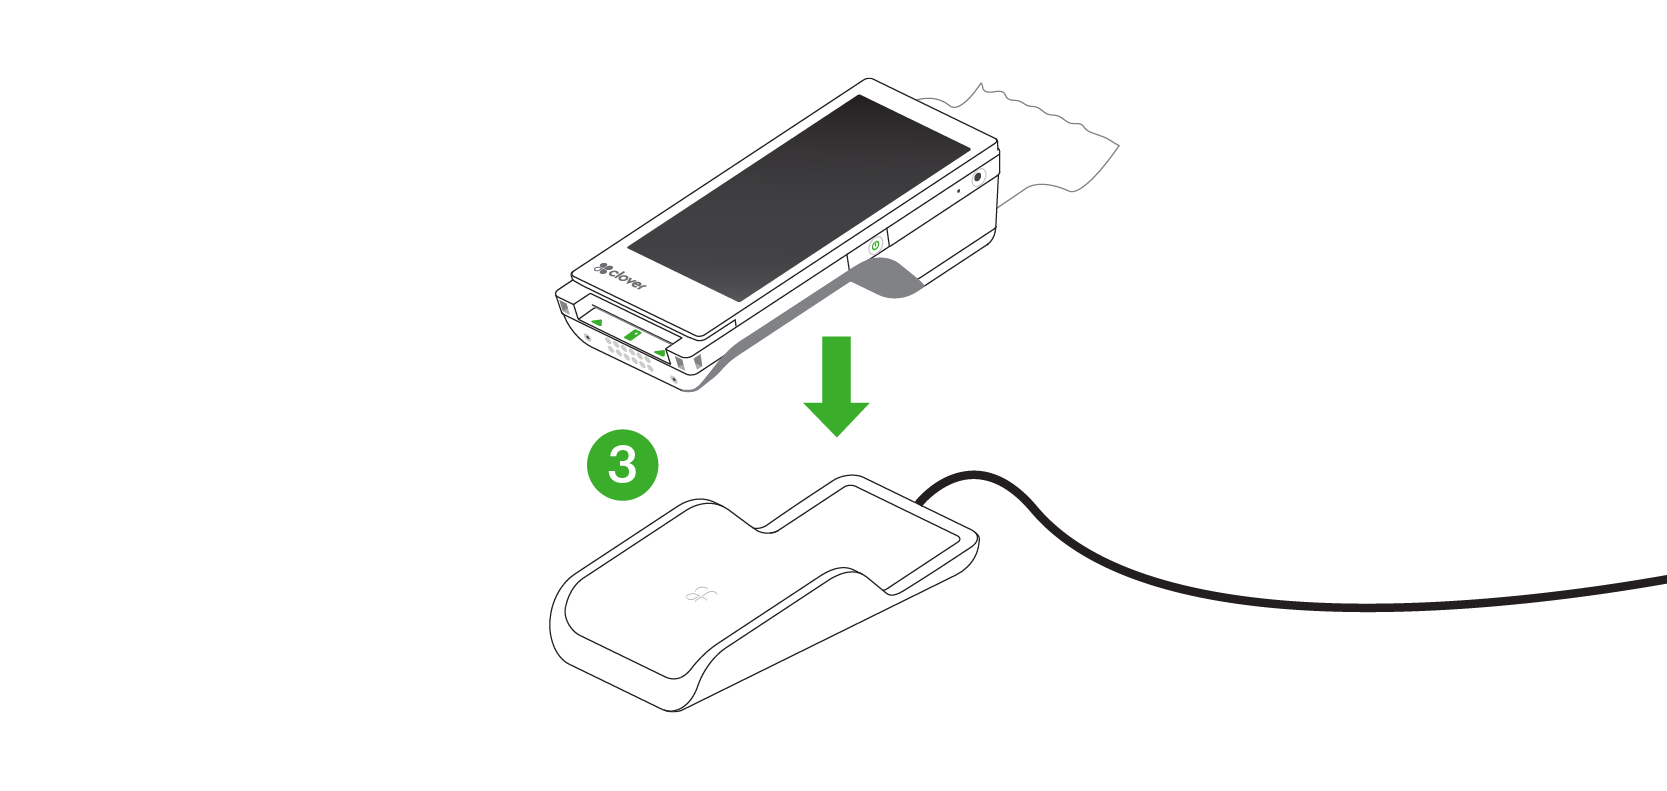
Plug the power cord into the Flex and into a power outlet.
Set the Flex on top of the charging cradle.
Allow the device to charge until the indicator lights on the cradle turn solid green.
Replace the Flex battery
If you have a Flex model with a replaceable battery, follow these instructions to remove the old battery and replace it with a new one.
Power off the device.
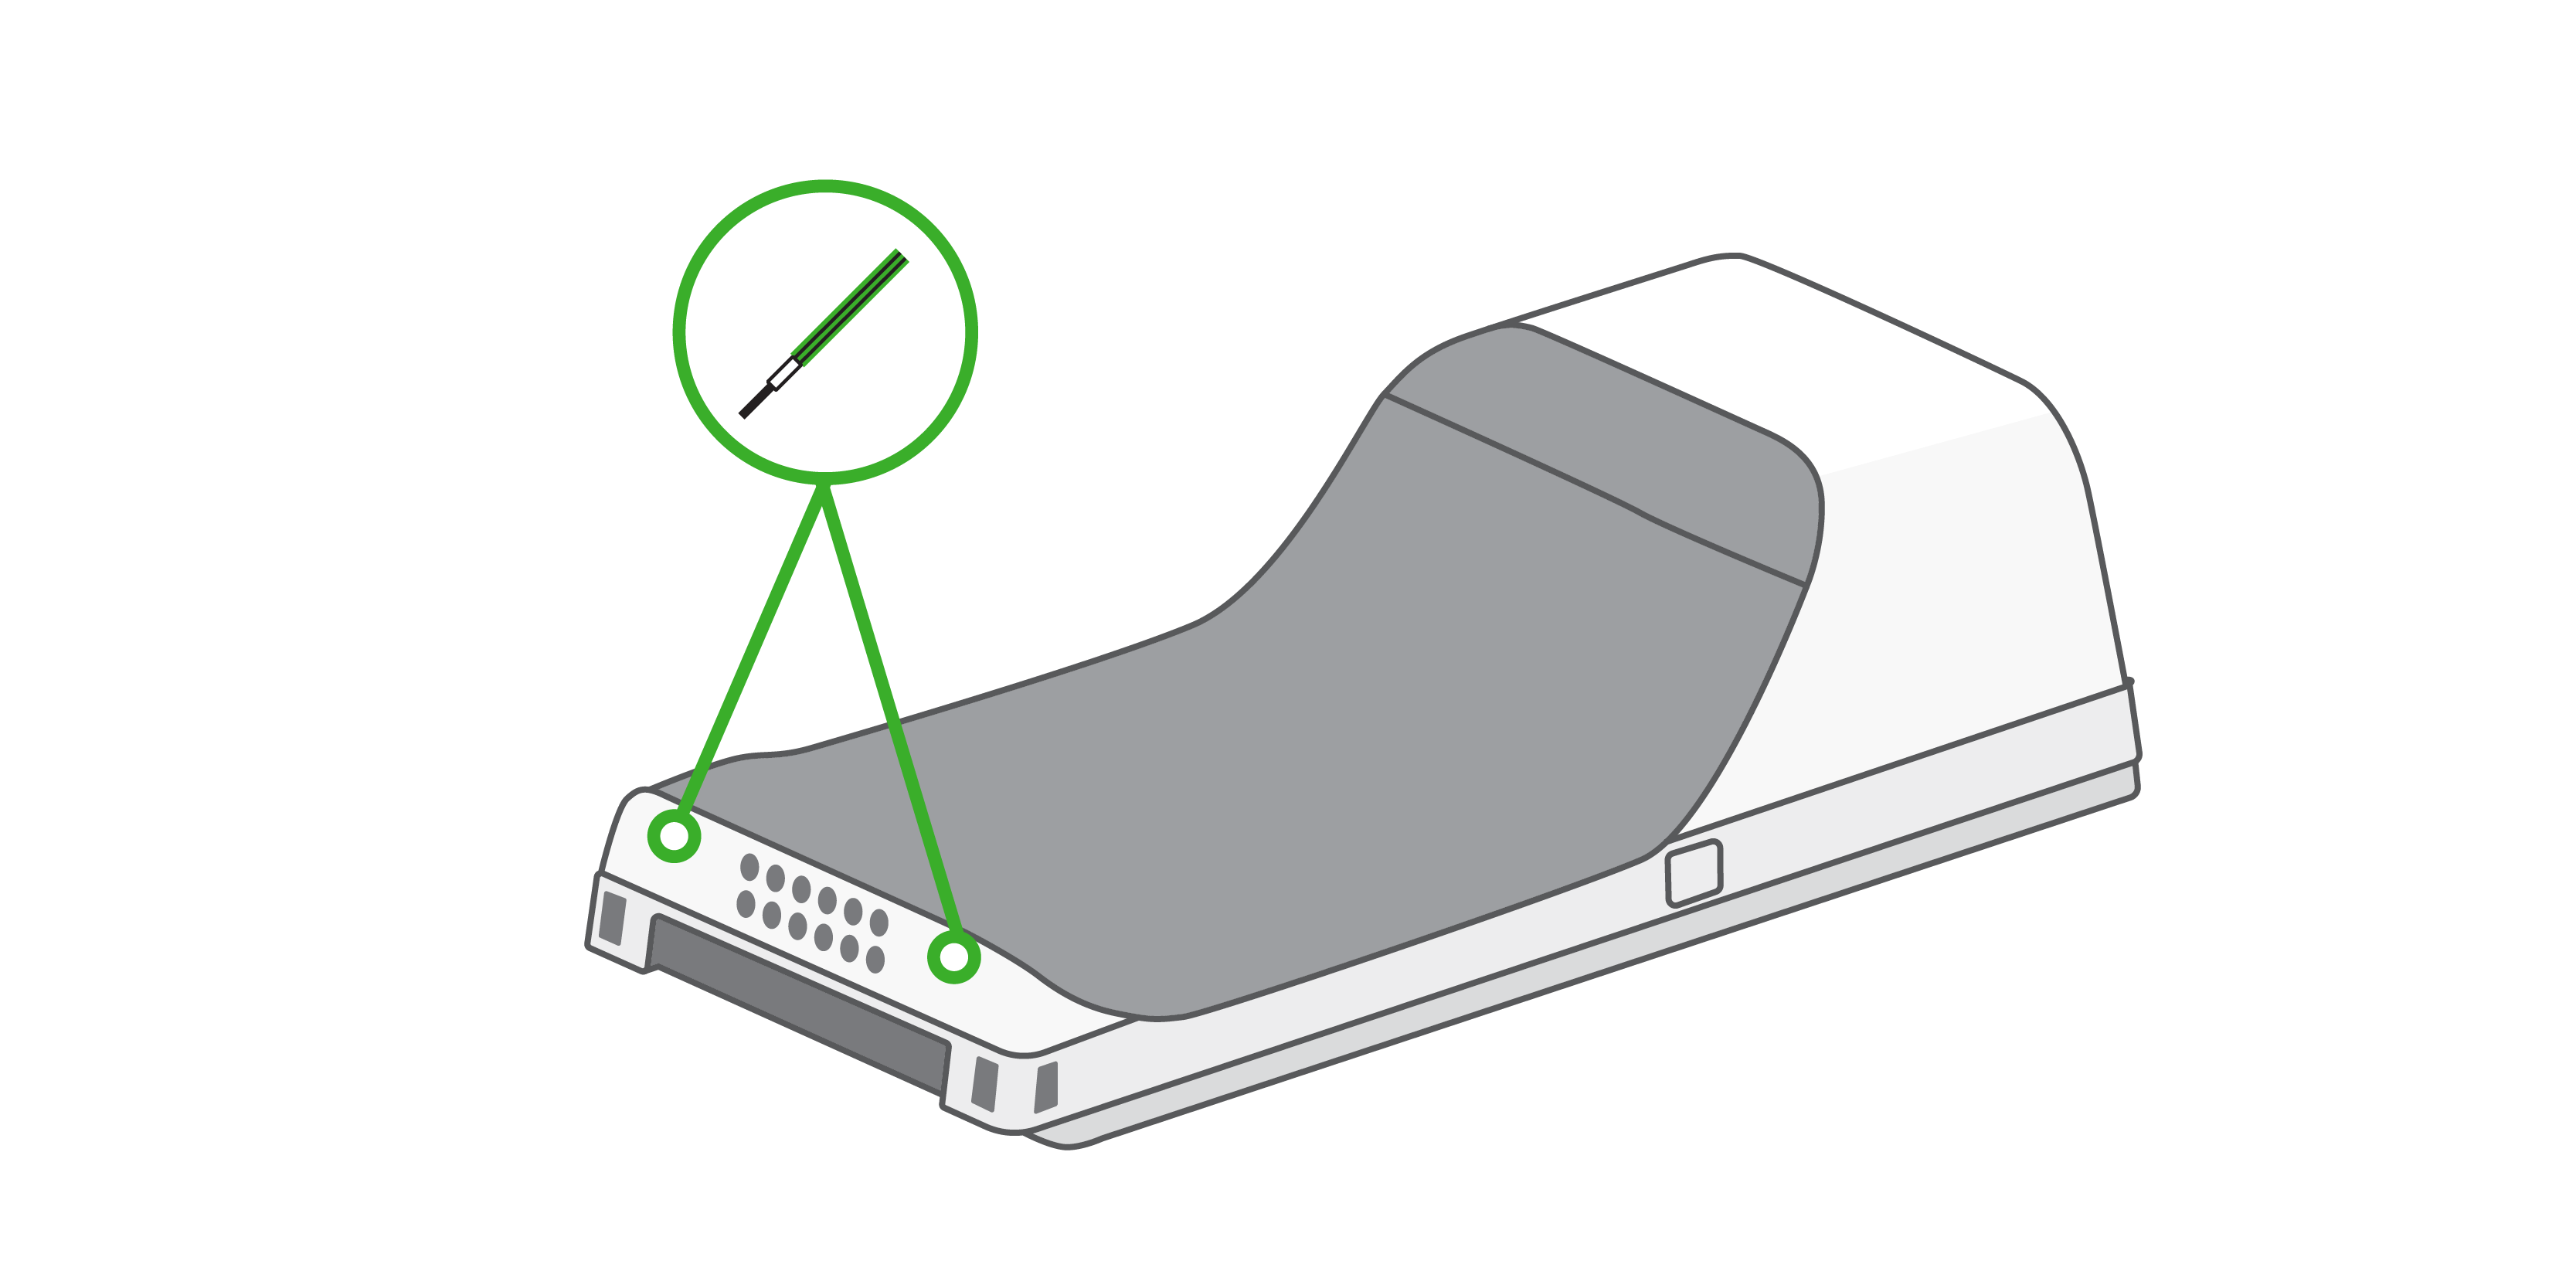
Use a 1.5mm hex key or hex screwdriver to remove the two screws at the bottom.
Lift off the battery door from the bottom of the device.
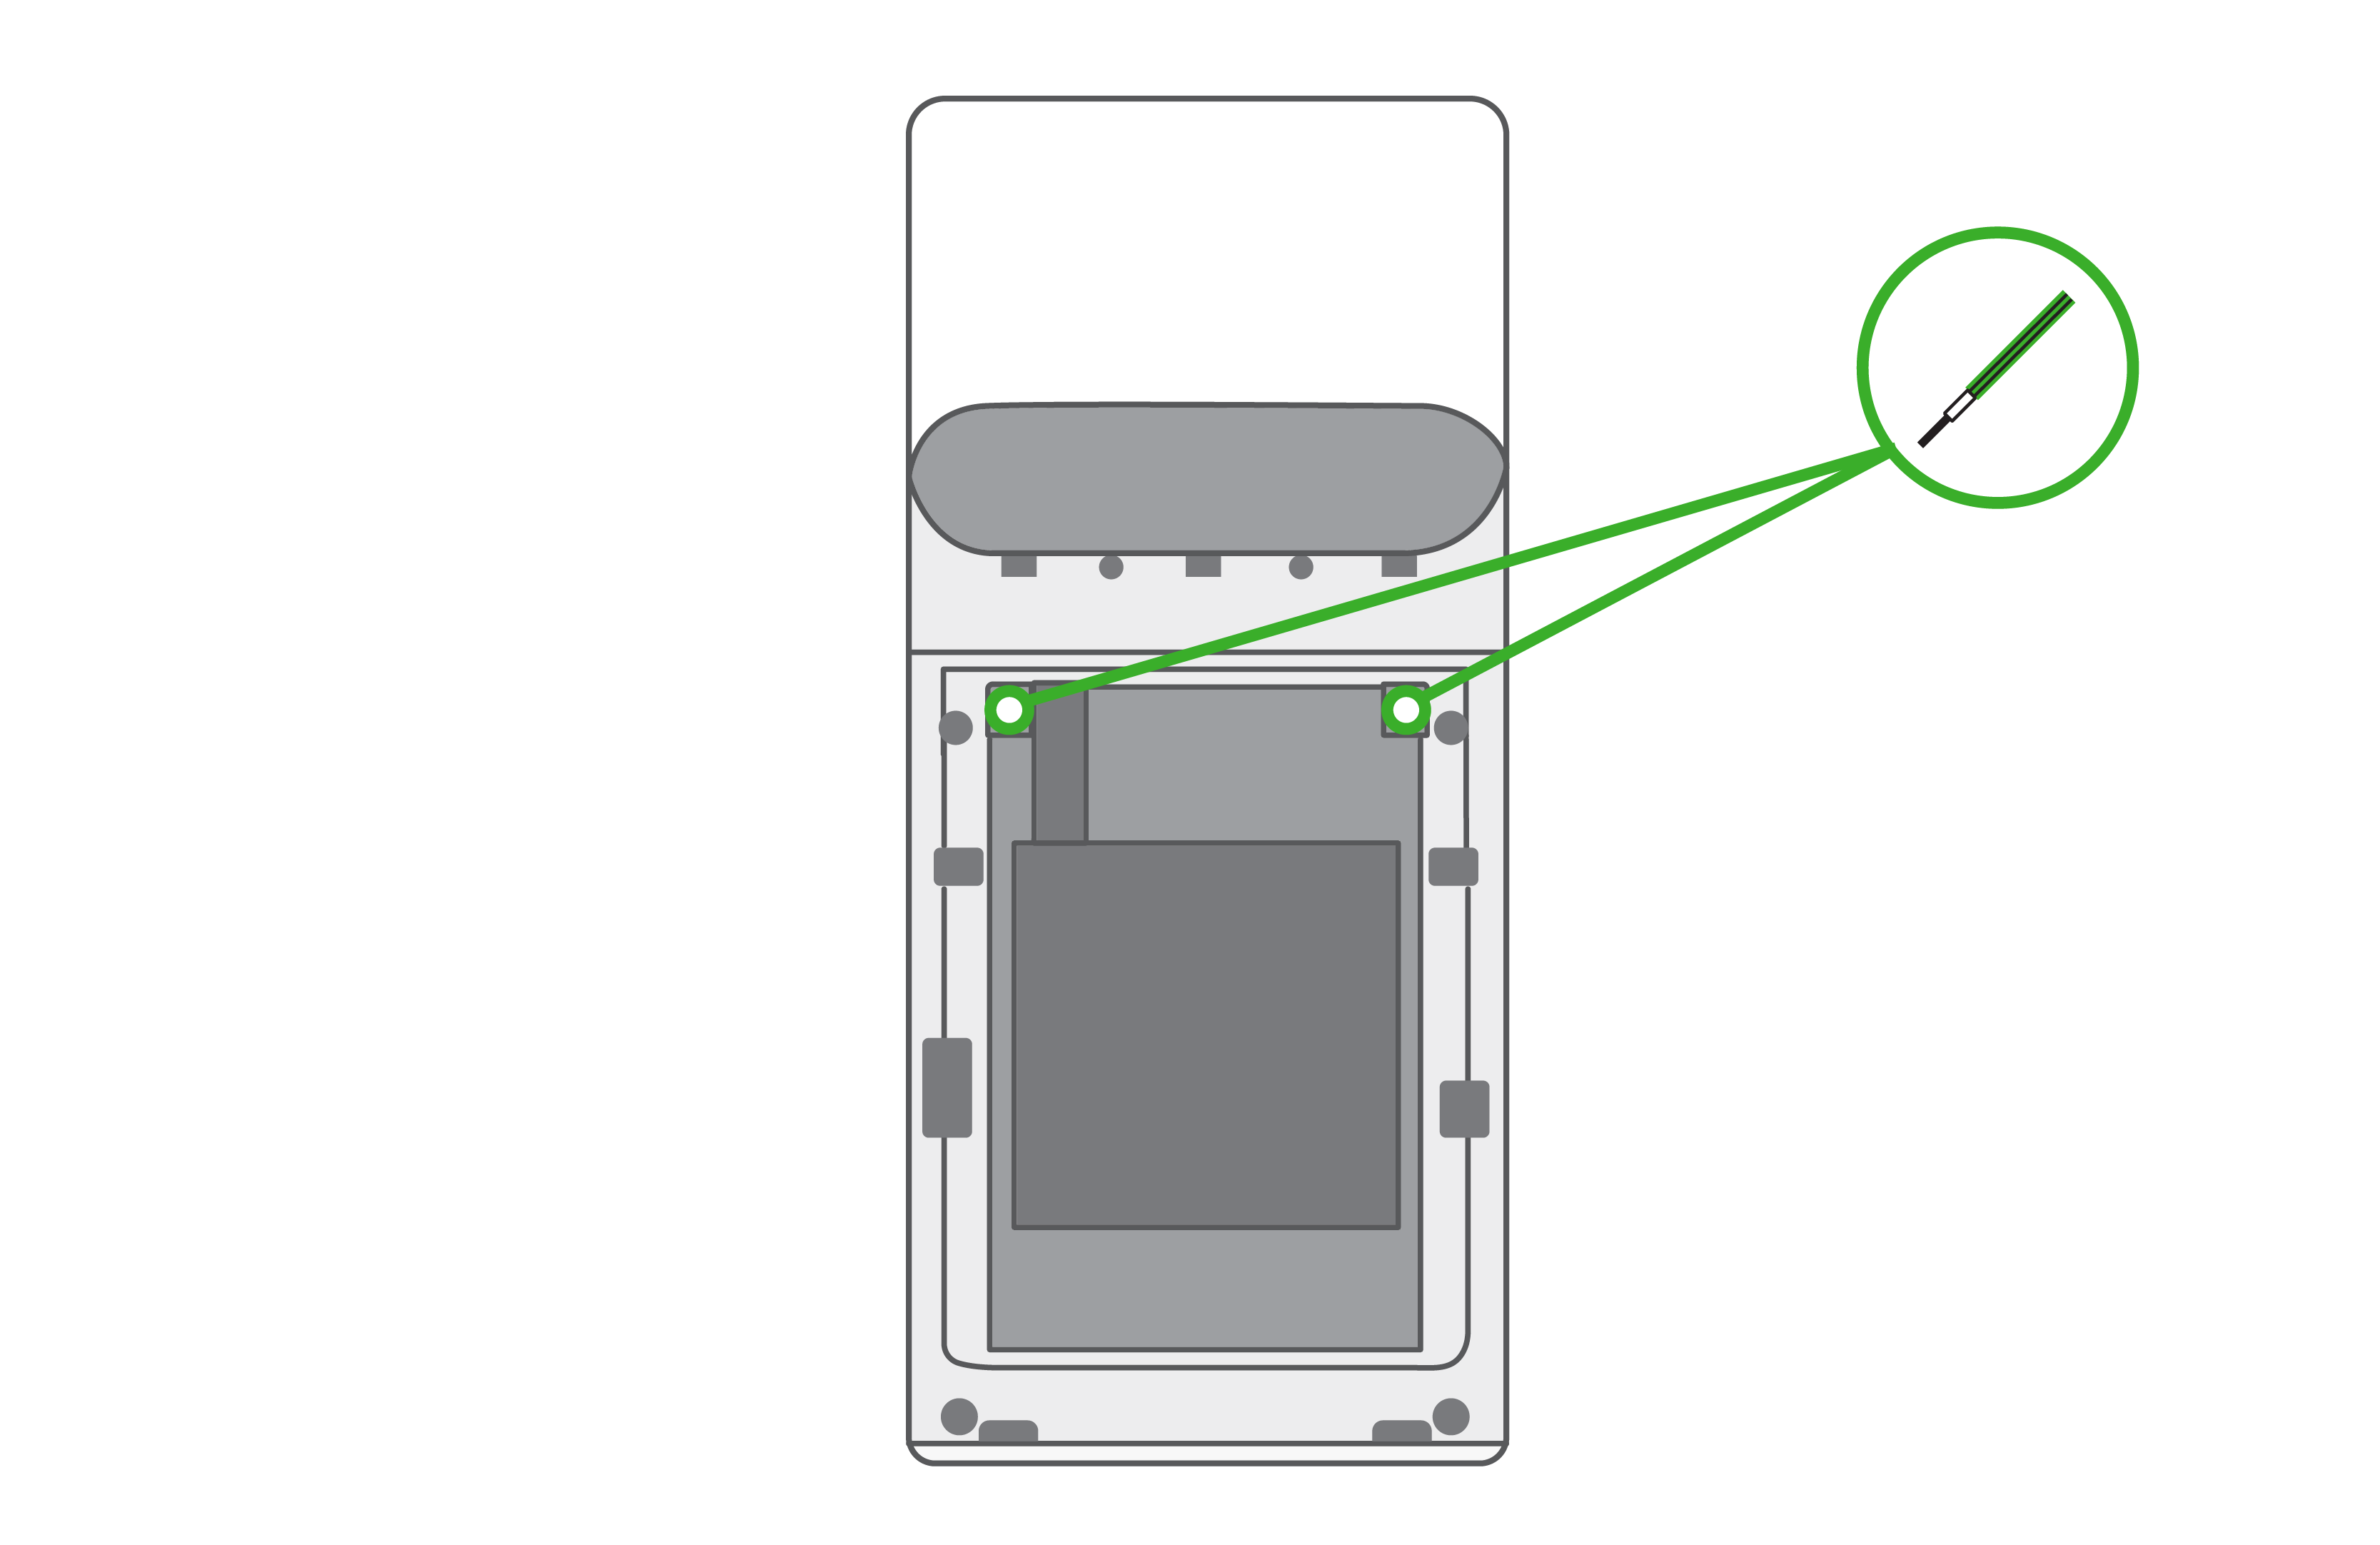
Remove the two screws near the top of the battery.
Pull down gently to remove the battery
Insert the new battery and reattach the screws and cover.
Dispose of the old battery in accordance with local regulations.
Change the Flex SIM card
The Flex 4 comes with a pre-installed SIM card. If you’d prefer to use your own SIM card, you can replace the existing one. To access the SIM card, you'll need to remove the battery from the device first.
Power off the device.
Use a 1.5mm hex key or hex screwdriver to remove the two screws at the bottom.
Lift off the battery door from the bottom of the device.
Remove the two screws near the top of the battery.
Remove the battery by gently pulling it down from the top of the battery.
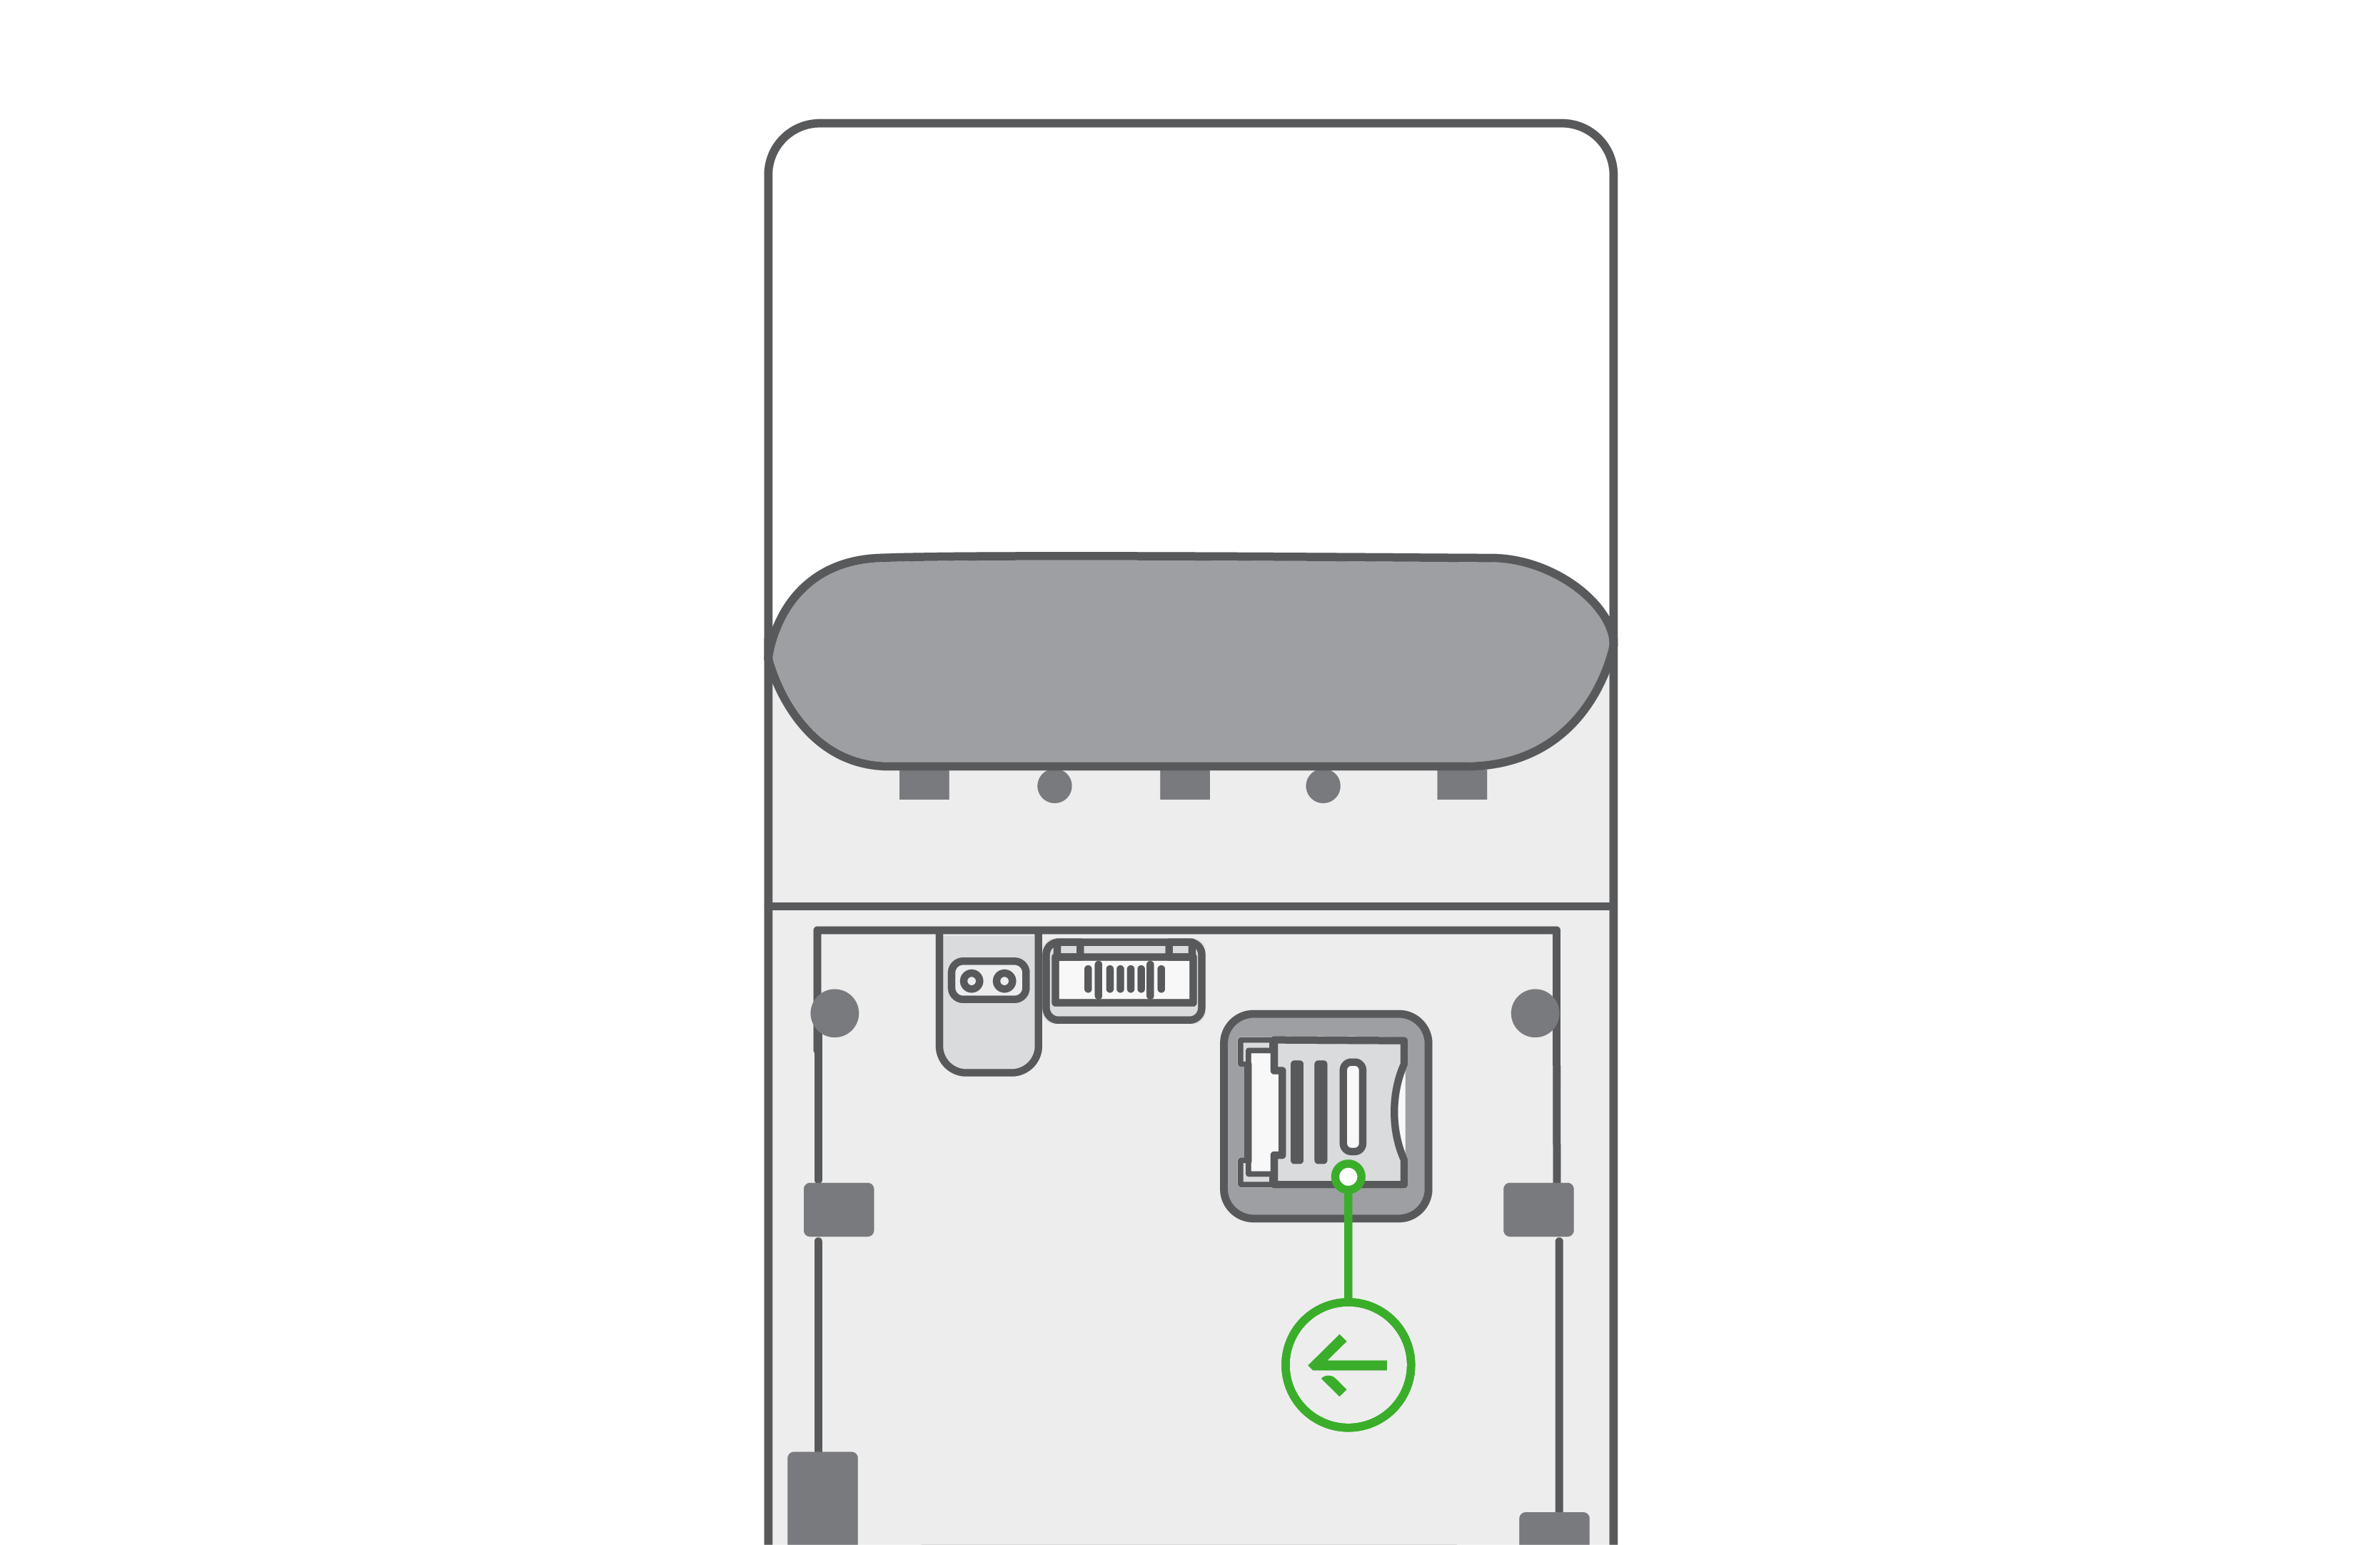
Slide the SIM card door to the left and lift it to open.
Remove the current SIM and replace it with your own, making sure the notched corner of the card is at the top right.
Place the battery back in the device and reattach all screws.
Use the Flex 4 printer
Load the receipt paper
Hold the Flex so that the back of the device faces you.
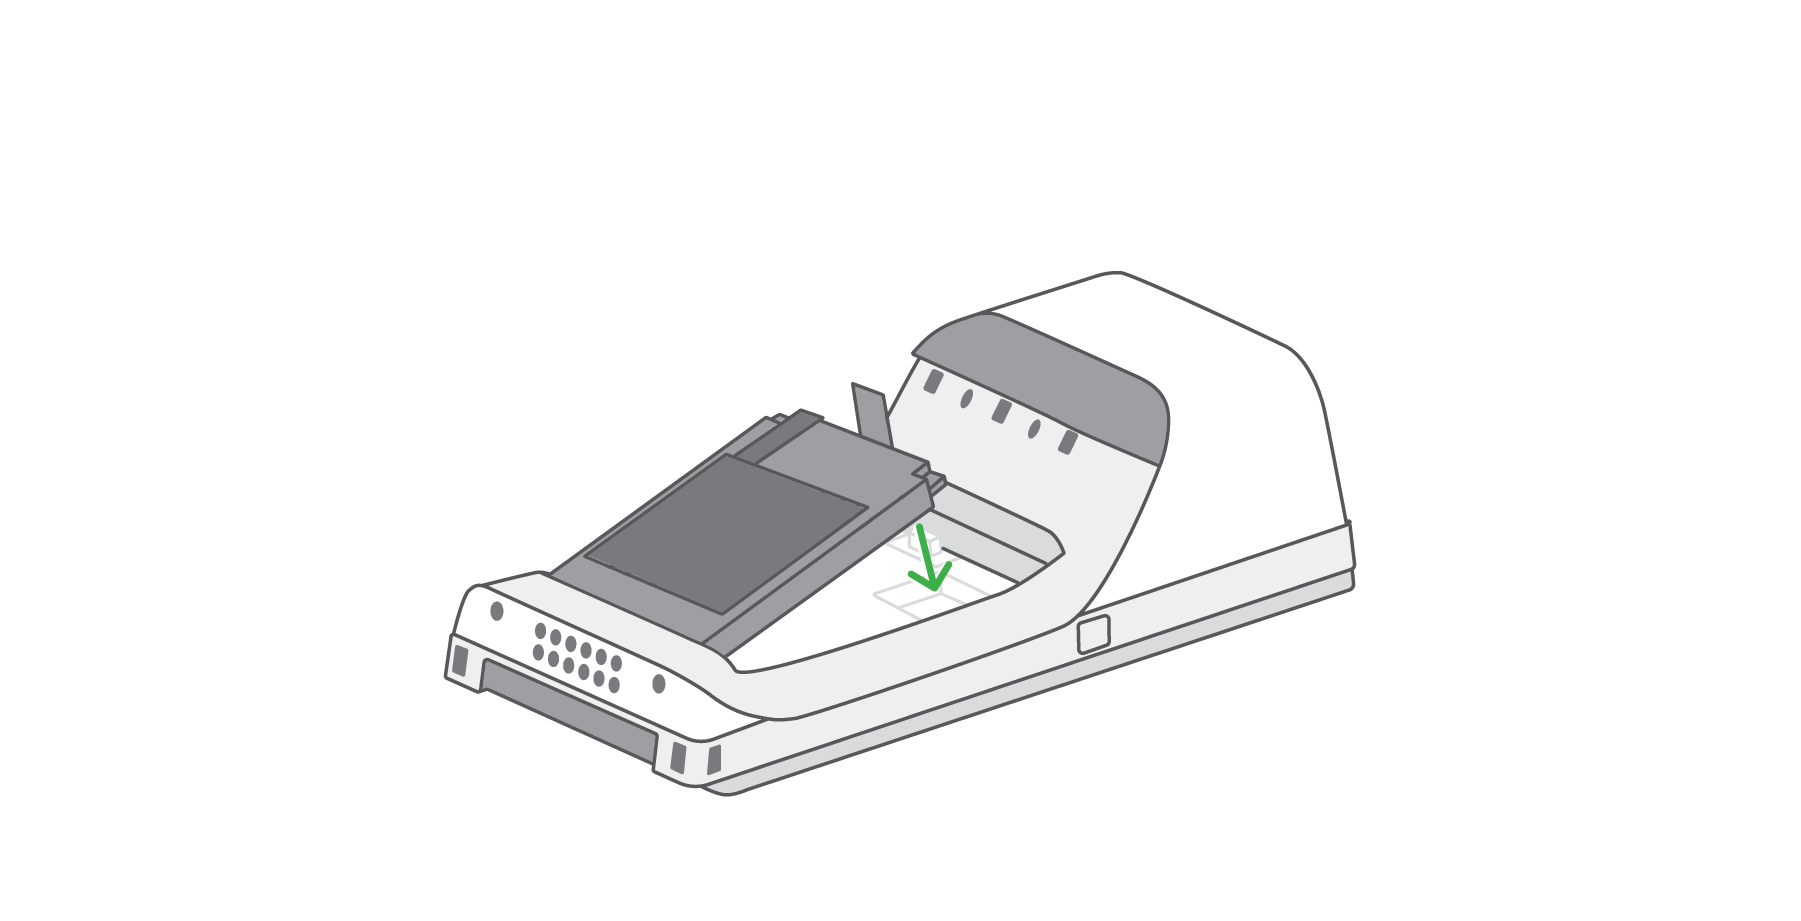
Open the paper compartment by pulling the top of the compartment door toward you.
Insert the paper roll so the end feeds straight out of the slot.
Close the compartment door until it clicks.
On the display screen, tap to print a test receipt.
Purchase new receipt paper
You can purchase receipt paper for your Clover device at major retailers like Staples or Office Depot, or reach out to Clover Support to order paper. If you’re setting up a new device or replacing receipt paper for an existing machine, be sure to use the correct size roll. Use thermal paper rolls sized 2 1/4 in x 85 ft (5.7 cm x 25.9 m) for Mini and Flex internal printers.
To order receipt paper on the device:
On the home screen of your Clover device, find Order Paper.
Follow the instructions to order paper.
Select the correct paper size.