<--- Clover PracticePay Help /Clover Devices
Set up a Mini 3
The Clover Mini 3 is a compact 8" countertop POS that supports EMV chip, NFC tap‑to‑pay, and magstripe payments, with easy front access to all payment inputs. Use it as a standalone device that can swivel between you and your customers, or pair it with another Mini as a customer‑facing unit. It accepts swipe, dip, tap, and digital wallets like Apple Pay® and Google Pay™. Customers can receive printed receipts from the built-in printer or get them by email or text.
What's in the box?
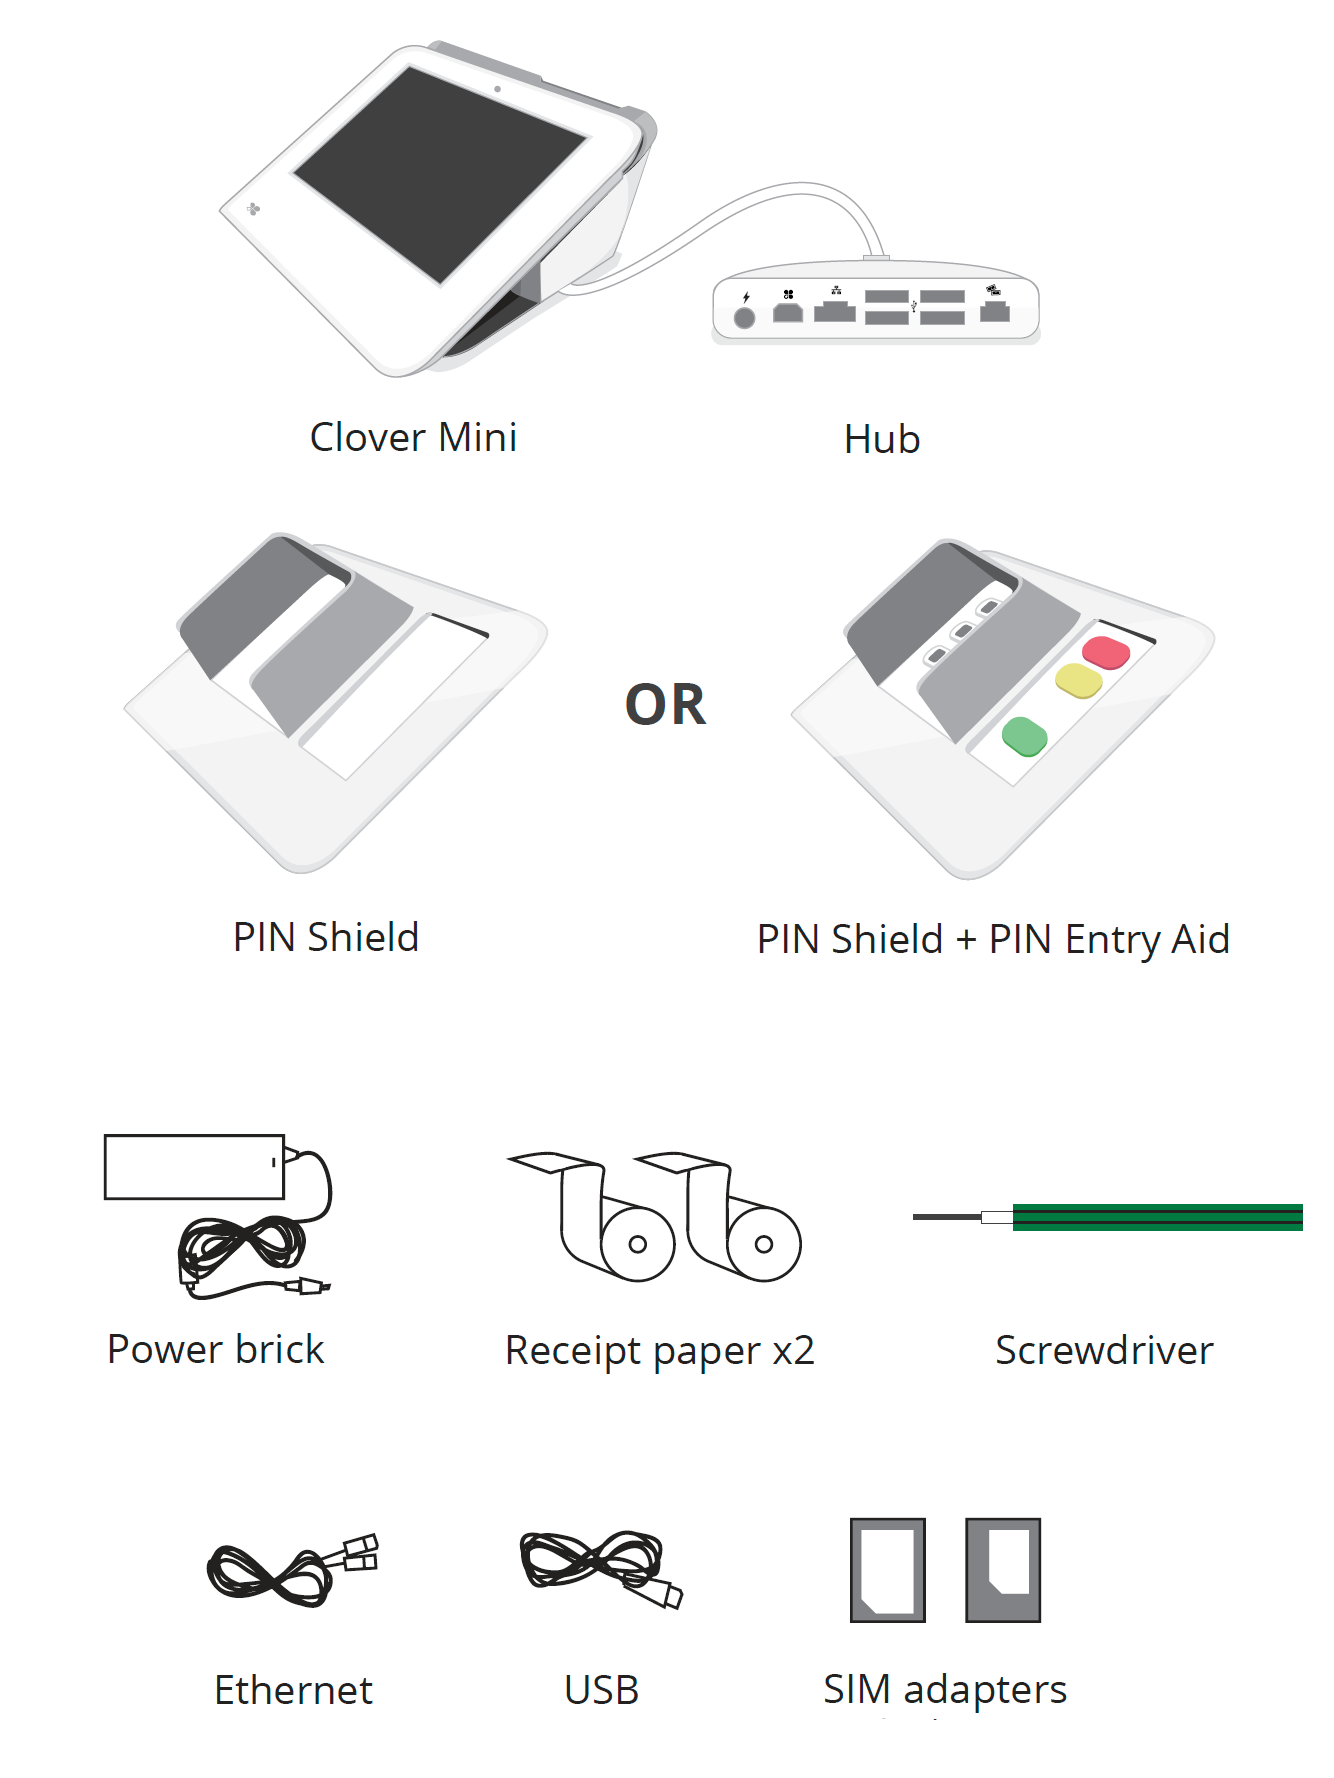
Your Mini 3 ships with items documented in Clover Mini 3 Quick Start Guide. After powering on your device, you can either follow the Setup wizard to activate the device or use the instructions that follow.
Set up your hardware
The Clover hardware package includes:
Connect your hardware
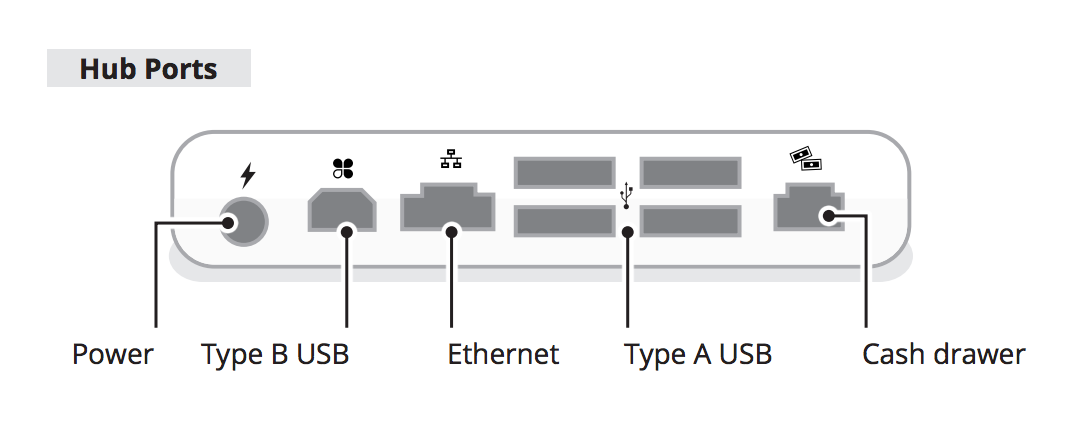
1. Plug all accessories into the hub. Provided Ethernet and USB cords are optional.
2. Plug power brick cable into the hub charger port.
3. Plug the power cord into the power source. The device will automatically power on.
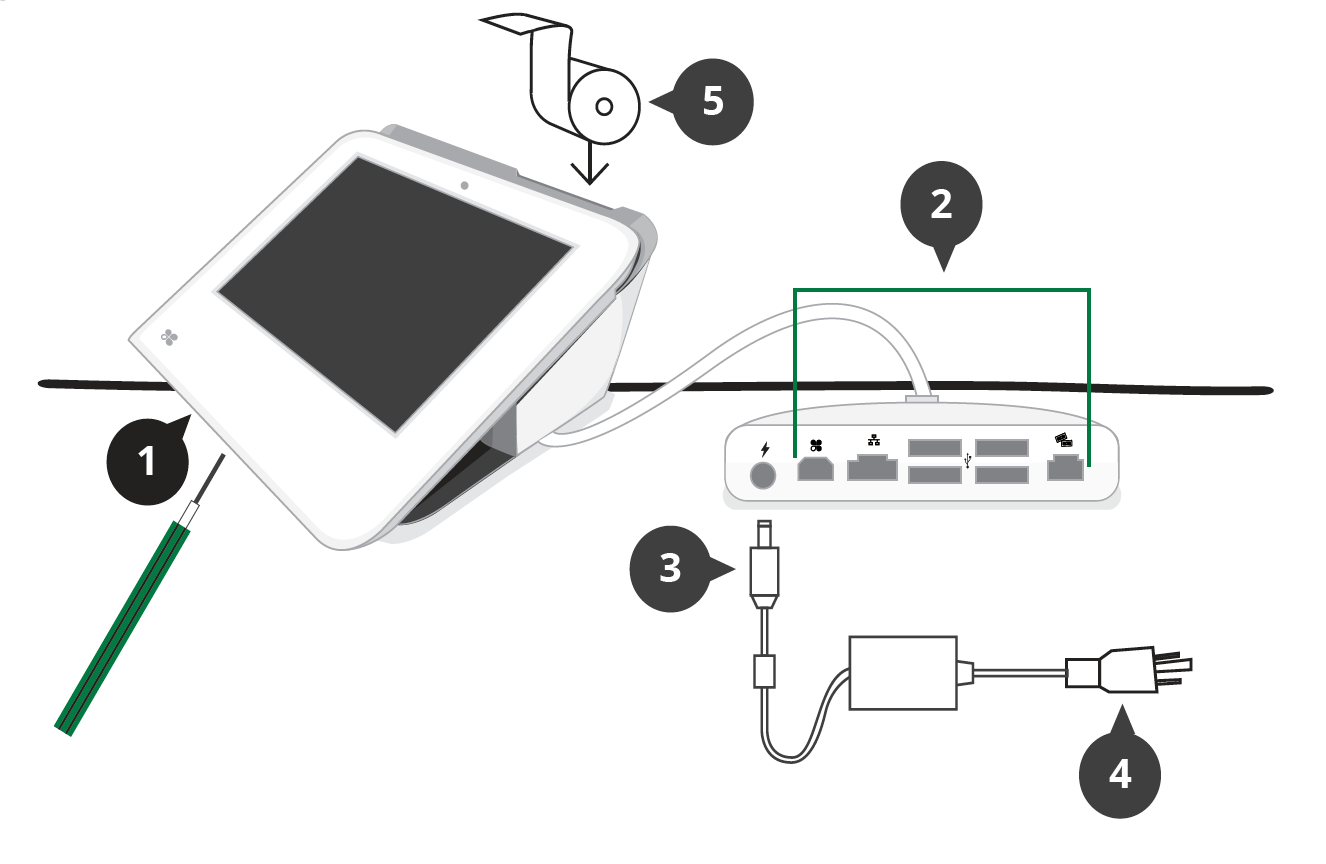
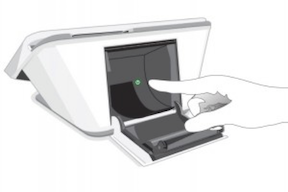
4. Pull on the receipt door and load paper.
If the device doesn't power on when plugged in:
1. Leave the Mini plugged in for at least 30 minutes to allow the backup battery to charge.
2. Unplug all cables from the hub.
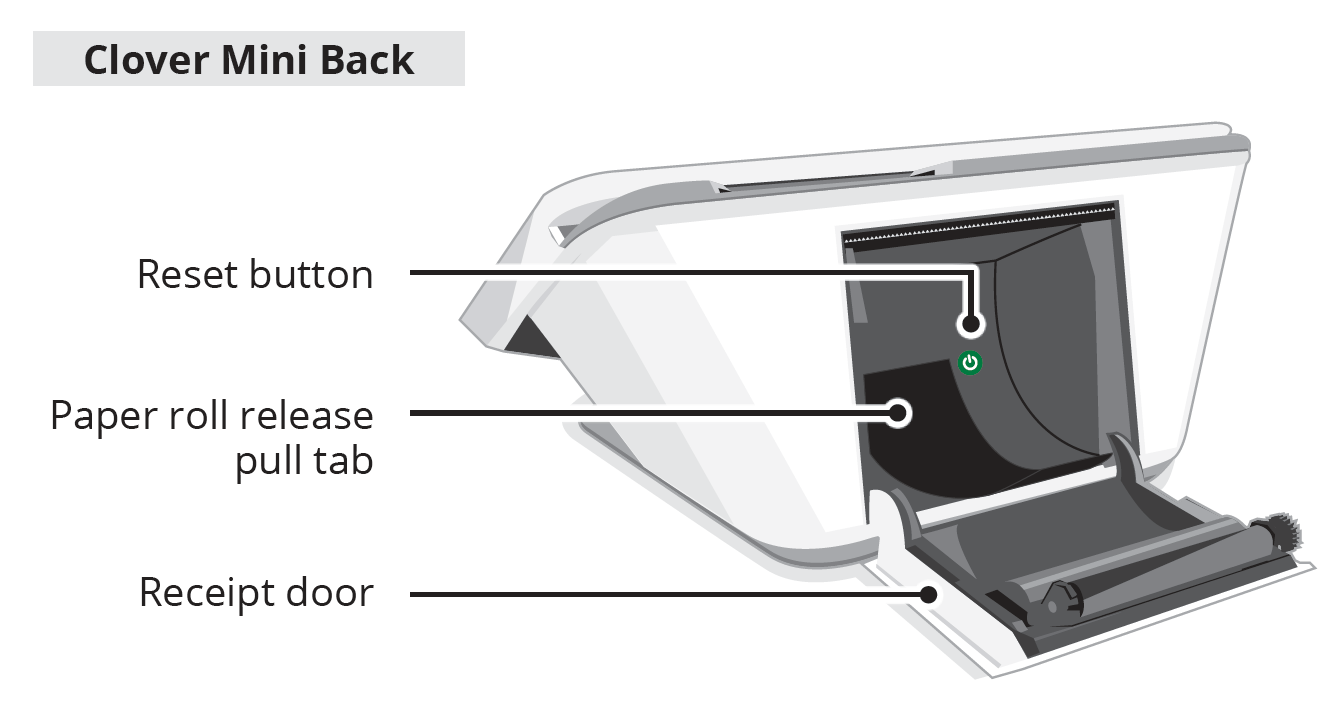
3. Press and hold the power button for 20 seconds, located in the receipt compartment at the back of the Mini.
4. Plug the black power cable back into the hub.
5. After you see the Clover logo display on the screen, plug in any other connecting cables and cords that were originally attached to the Mini, or that you would like to attach.
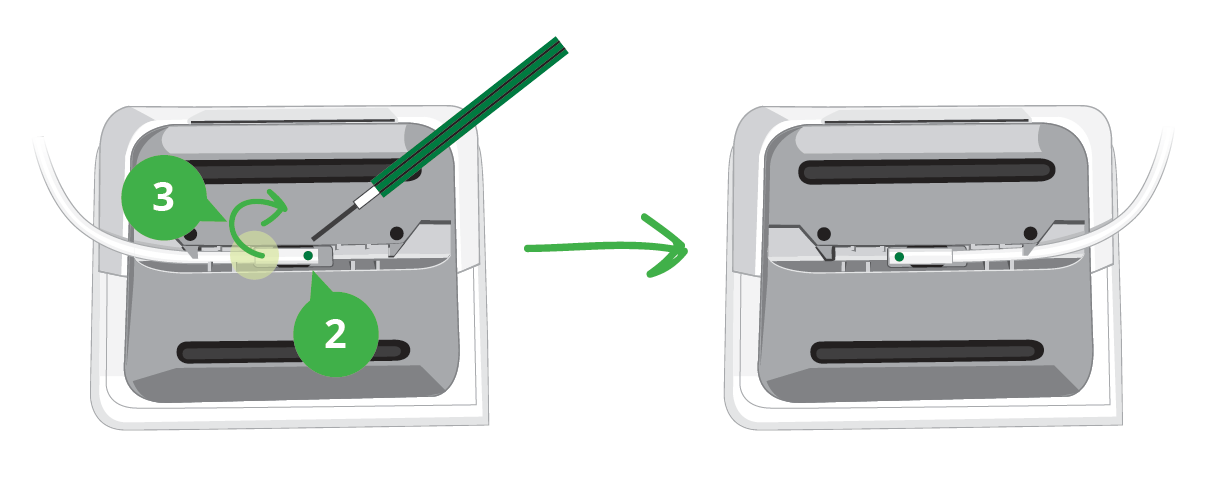
Switch the hub cable direction
You may optionally want to switch the direction of the hub cable attached to the underside of the device.
1. Turn Clover Mini over to access the underside.
2. Use the provided screwdriver to loosen the green screw.
3. Switch the cable to the direction you want.
4. Tighten the green screw. The green screw on the hub connector must always be tightened to ensure a reliable connection.
Connect your Clover device to a network
You need an internet connection to activate your device.
If your Ethernet cable is already plugged into the hub, your device automatically tries to connect using Ethernet.
If you want to use Wi‑Fi, enter your network name and password. Your network must have a security level of WPA or WPA2.
Replace the SIM card
1. Loosen the green screw and open the card slot.
2. Place the new card on the matching SIM adapter.
3. Slide the adapter into the slot, close it, and tighten the screw.
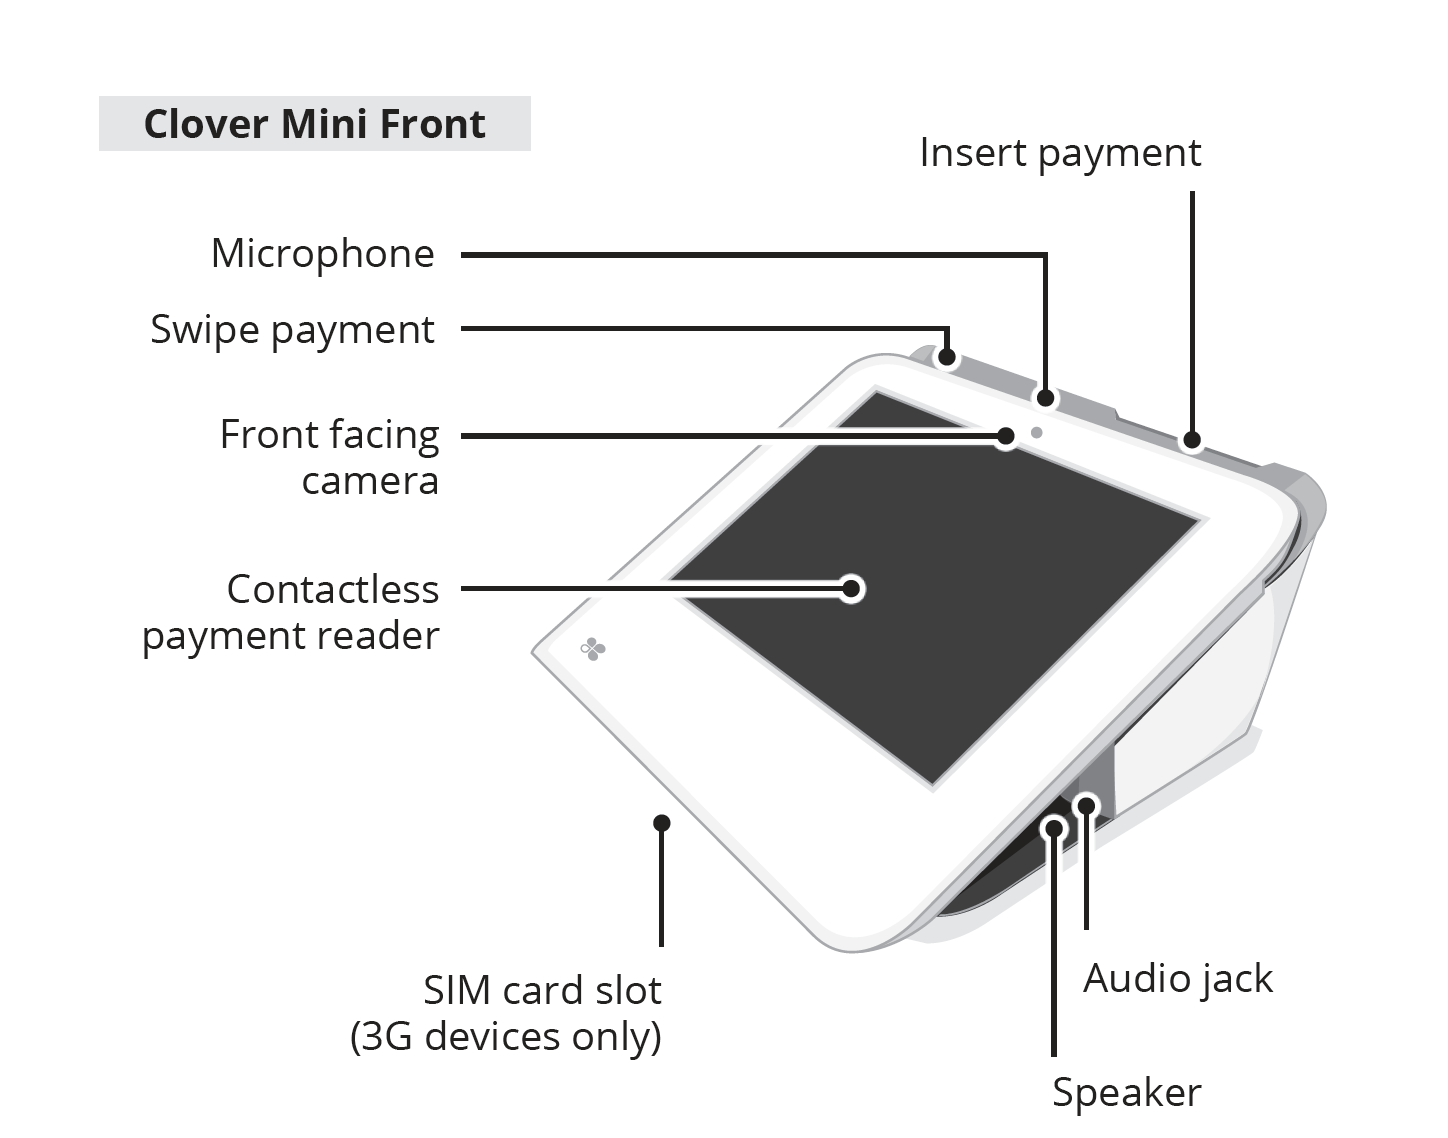
What's on the Mini
Credit card reader (dip / EMV chip reader): Allows customers to insert chip‑enabled cards to complete secure, authenticated EMV transactions.
Side‑mounted credit card reader: Lets customers swipe magnetic‑stripe cards when chip or contactless payments aren’t used.
Contactless reader (NFC reader): Enables customers to tap contactless cards, mobile wallets, or other NFC‑enabled devices for payment.
Front‑facing camera and barcode scanner: Used to scan items, manage inventory, or support apps requiring image capture.
Built‑in thermal receipt printer: Prints payment receipts directly from the device without needing an external printer.
After you set up your Mini, you need to activate and secure your device.
Find your Mini serial number
To find your Mini serial number, do one of the following:
On a Clover device, go to the Setup app > Devices and look in the ID column.
On the back of the device, open the receipt paper door and look at the black, plastic tab under the paper roll. Mini 3 serial numbers start with C035.